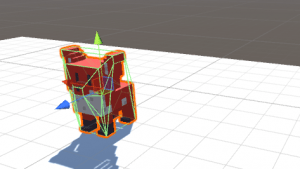
This article describes the process of creating voxel explosions in Unity by using particles. For our models, we use MagicaVoxel, but every other tool can be used as well. The final result will look similar to this:
Setting up the test environment
For test purposes, I’ve set up a basic FPS environment using the built-in CharacterController package. I then added a gun model to the _FirstPersonCharacter _game object, which is located as child element in the hierarchy of the FPSController. The following snippet shows the code I added as a custom script component to the gun:
| |
So basically, this script takes up three public variables, one for the camera of the controller, which is needed to shoot from the player’s perspective, a maxDistance to set how far can be shot, and an AudioClip to play a sound file when a shot has been fired. Additionally, there are a few private variables:
- fireRate, to set how fast shots can be fired after each other
- nextFire, which is used to determine when a shot can be fired
- t, which represents the transform component of the current gameObject
Every frame I check if the left mouse button is pressed. If so, a shot should be fired if the method IsOkToShoot() returns true. This happens when the current time minus the last time shot is larger than the previously set fireRate.
When an actual shot happens, the sound is being played where t.position determines the location from where the shot is going to be heard. After that, I call up a ray cast to scan the targeted environment for possible targets. The outgoing argument hit provides information about the target that has been hit (if nothing has been hit, the code inside the outermost if-statement will not be executed).
I created a custom tag called Enemy, which is going to be added to all the objects I want to hit. These are going to get a custom script called ExplosionScript, which contains a method named Explode. The next step is to build this script and actually blow something up.
Exploding Voxels
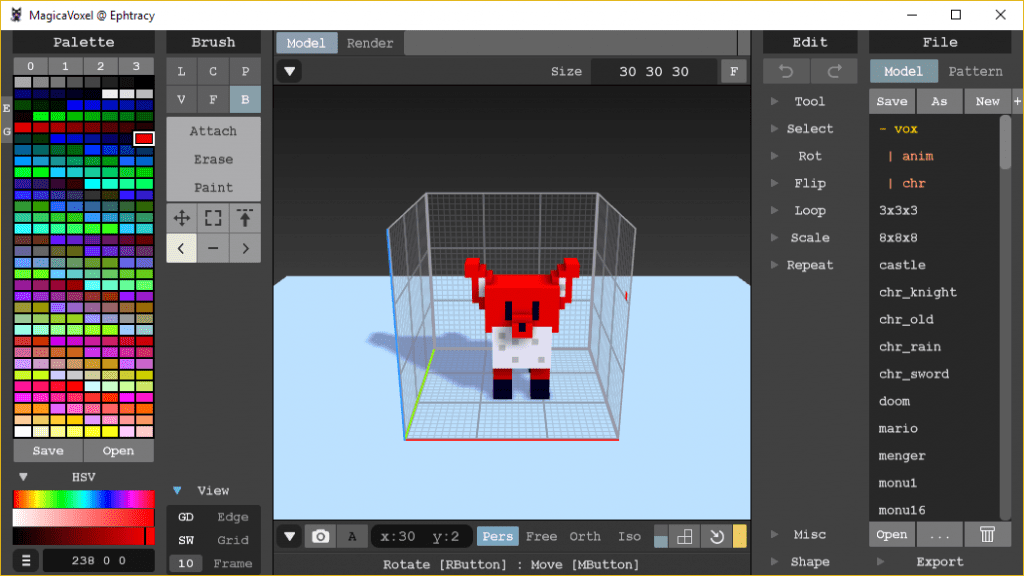
I’m using a basic model for testing purposes, that can bee seen in the screenshot below.
It currently consists of an empty GameObject as parent, which has been expaned by adding a MeshCollider. The child element contains the actual content.
At first, a ParticleSystem is going to be added to the object. I use the following configuration here:
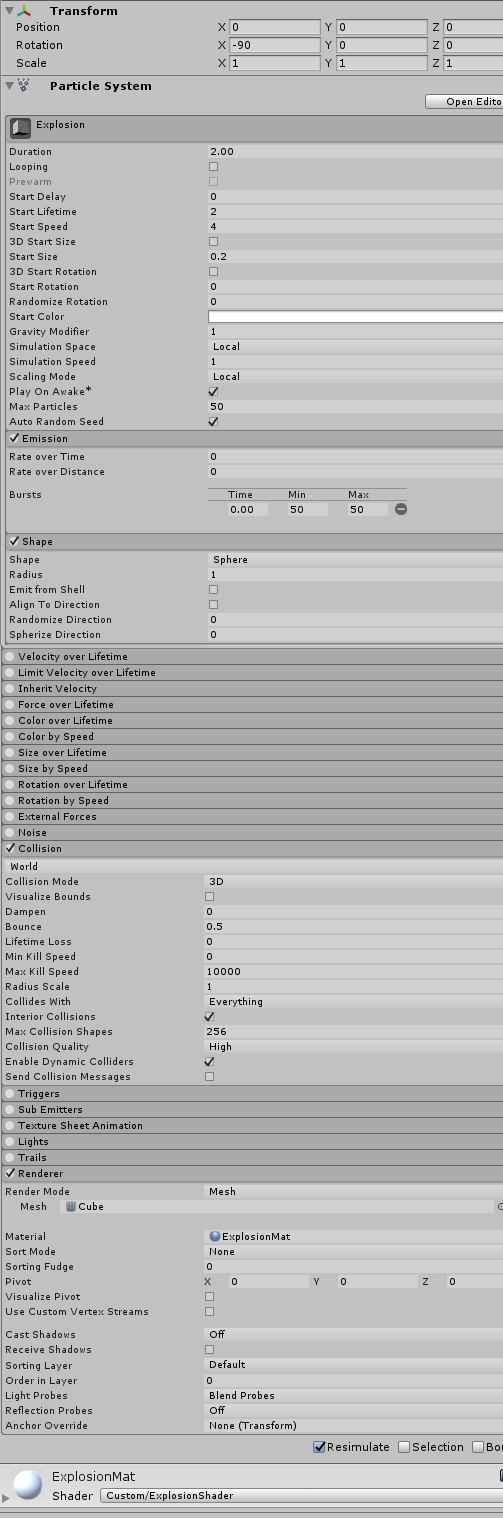
Note that the last setting (shader) can’t be set yet. That will be created later. Also, ExplosionMat is just a regular material. After configuring the ParticleSystem, the animation should look like some cubes exploding and falling on the ground. Now the colors of the cubes need to be adjusted. The problem is, that a custom shader and a bit of additional coding is needed here. Now you just create a new prefab and move the ParticleSystem onto it. Then delete it from the object that has been used for testing.
I’ll start with the shader. You use the context menu and add a new shader - standard surface shader. You can open the newly created file with Visual Studio (or whatever editor you want) and edit it to match our plan:
    Properties {
        _Color ("Color", Color) = (1,1,1,1)
        _MainTex ("Albedo (RGB)", 2D) = "white" {}
        _Glossiness ("Smoothness", Range(0,1)) = 0.5
        _Metallic ("Metallic", Range(0,1)) = 0.0
    }
    SubShader {
        Tags { "RenderType"="Opaque" }
        LOD 200

        CGPROGRAM
        // Physically based Standard lighting model, and enable shadows on all light types
        #pragma surface surf Standard fullforwardshadows

        // Use shader model 3.0 target, to get nicer looking lighting
        #pragma target 3.0

        sampler2D _MainTex;

        struct Input {
            float2 uv_MainTex;

            // NEW LINE
            float4 vertexColor : COLOR;
        };

        half _Glossiness;
        half _Metallic;
        fixed4 _Color;

        void surf (Input IN, inout SurfaceOutputStandard o) {
            // Albedo comes from a texture tinted by color
            fixed4 c = tex2D (_MainTex, IN.uv_MainTex) * _Color;

            // NEW LINE:
            c *= IN.vertexColor;


            o.Albedo = c.rgb;
            // Metallic and smoothness come from slider variables
            o.Metallic = _Metallic;
            o.Smoothness = _Glossiness;
            o.Alpha = c.a;
        }
        ENDCG
    }
    FallBack "Diffuse"
}
There are two lines that need to be adjusted, I’ve marked them with the comment //NEW LINE. After that, the currently used material for the particles should be set to the color white. The color that is going to be set later will be mixed with the default color, and if that isn’t white the colors won’t match our wanted ones. Also, the shader of the material needs to be set to the newly created one.
An additional script is needed to edit the palette.
| |
Again, here are some public and private variables:
- explosionPrefab represents the prefab containing the ParticleSystem
- explosion is an instance of the prefab
- exploding is a flag for controlling the explosion
- colors is an array containing the colors that are going to be assigned to the exploding particles
The first method starts the explosion. It instantiates the explosion at a given position, which is going to be where the ray cast hit the object. In LateUpdate(), the particles are going to be painted. This method is only run, when the exploding-flag is set to true, and it is also run only once, which is why the flag is set to false again at the end.
The gameObject itself is destroyed in the very end, since it is needed to assign its properties to the ParticleSystem created at runtime.
All the particles of the explosion are collected inside the _particles _array. The for-loop is iterating through all of the particles and assigns a new color. The color is determined via random selection of a color of the above-mentioned array. I found this solution to be a bit ugly, so I created another script called ColorManager, which contains arrays for each of my models. It basically just contains the following code:
| |
Note that you can view the colors that have been used using MagicaVoxel by clicking on the tool marked by a smaller-than sign and then clicking on HSV.
If this is done, the explosions should work!